Creating a new resource
In this exercise we are going to use the REST interface in combination with the
HTTP operations POST and PUT to create a resource on the server. In
contrast to the previous module here we are going to use the command line tool
cURL to access the catalog. cURL is a command line tool to transfer data from
or to a server using one of the supported protocols (e.g. HTTP or FTP). For more
about the tool have a look at here.
Creating a new workspace
In this module we are going to repeat the steps we have done in chapter
Publishing a vector layer. But as we
don't want to override our progress (or any individual changes) made to the
workspace momo, we will create new workspace momo-rest for the ensuing
exercises.
- Open up the terminal (if not already openend) and type in the following
command to create a new workspace named
momo-rest:$ curl \ -v \ -u admin:momo-ws\ -XPOST \ -H "Content-type: text/xml" \ -d "<workspace> <name>momo-rest</name> </workspace>" \ http://localhost/geoserver/rest/workspacesGETwe use the operationPOSTand in addition we transfer aXMLcontent containing a simple workspace definition to the unique endpointworkspaces. - Hit
Enterto execute the above command and you will see an output like this:
Here, two informations are crucial to us:* Hostname was NOT found in DNS cache * Trying 127.0.0.1... * Connected to localhost (127.0.0.1) port 80 (#0) * Server auth using Basic with user 'admin' > POST /geoserver/rest/workspaces HTTP/1.1 > Authorization: Basic YWRtaW46Z2Vvc2VydmVy > User-Agent: curl/7.35.0 > Host: localhost:80 > Accept: */* > Content-type: text/xml > Content-Length: 57 > * upload completely sent off: 57 out of 57 bytes < HTTP/1.1 201 Created < Date: Wed, 03 Feb 2016 10:30:39 GMT < Location: http://localhost:80/geoserver/rest/workspaces/momo-rest * Server Noelios-Restlet-Engine/1.0..8 is not blacklisted < Server: Noelios-Restlet-Engine/1.0..8 < Transfer-Encoding: chunked < * Connection #0 to host localhost left intactHTTP/1.1 201 Created: The request has been successfully processed and the resource has been created.http://localhost/geoserver/rest/workspaces/momo-rest: The REST endpoint URL of our new workspace.
- We can verify that the workspace was actually created either by using the
GeoServer UI or the REST interface:
- Open the GeoServer user interface, navigate
to the page
Data❭Workspacesand ensure a new workspace namedmomo-restis available in the list. - Open the terminal and run the following command to get a
XMLrepresentation of all available workspaces:$ curl \ -v \ -u admin:momo-ws \ -XGET \ -H "Accept: text/xml" \ http://localhost/geoserver/rest/workspaces
- Open the GeoServer user interface, navigate
to the page
Creating a new store
Now that we have created a new workspace, we'll add a new data store to it. Here we are reusing the database we already created (and added to the geoserver).
- Open the terminal and insert the following command to create a new PostGIS
datastore named
db_momo_ws_rest:$ curl \ -v \ -u admin:momo-ws \ -XPOST \ -H "Content-type: text/xml" \ -d "<dataStore> <name>db_momo_ws_rest</name> <connectionParameters> <host>localhost</host> <port>5432</port> <database>db_momo_ws</database> <schema>geodata</schema> <user>momo</user> <passwd>momo</passwd> <dbtype>postgis</dbtype> </connectionParameters> </dataStore>" \ http://localhost/geoserver/rest/workspaces/momo-rest/datastores - Hit
Enterto execute the command. This will result in the following output, assuring that the store was successfully created:* Hostname was NOT found in DNS cache * Trying 127.0.0.1... * Connected to localhost (127.0.0.1) port 80 (#0) * Server auth using Basic with user 'admin' > POST /geoserver/rest/workspaces/momo-rest/datastores HTTP/1.1 > Authorization: Basic YWRtaW46Z2Vvc2VydmVy > User-Agent: curl/7.35.0 > Host: localhost:80 > Accept: */* > Content-type: text/xml > Content-Length: 347 > * upload completely sent off: 347 out of 347 bytes < HTTP/1.1 201 Created < Date: Wed, 03 Feb 2016 10:59:04 GMT < Location: http://localhost:80/geoserver/rest/workspaces/momo-rest/datastores/db_momo_ws_rest * Server Noelios-Restlet-Engine/1.0..8 is not blacklisted < Server: Noelios-Restlet-Engine/1.0..8 < Transfer-Encoding: chunked < * Connection #0 to host localhost left intact - Once again we can verify the successful creation in the GeoServer UI (
Data❭Stores).
Publishing a layer
In the next step we're going to publish the table tbl_countries as a new layer.
- Open the terminal and insert the following command to create a new feature
type (and layer) named
countries_rest:$ curl \ -v \ -u admin:momo-ws \ -XPOST \ -H "Content-type: text/xml" \ -d "<featureType> <name>countries_rest</name> <nativeName>tbl_countries</nativeName> <title>Countries</title> <nativeCRS>EPSG:4326</nativeCRS> <enabled>true</enabled> </featureType>" \ http://localhost/geoserver/rest/workspaces/momo-rest/datastores/db_momo_ws_rest/featuretypes - And again, verify that the response contains the lines
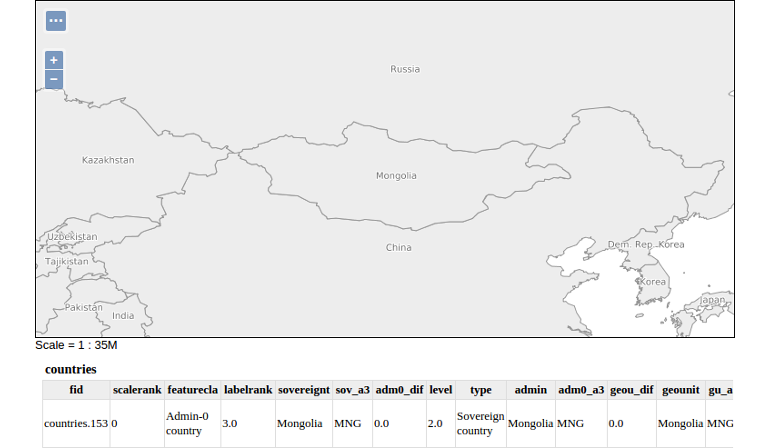
andHTTP/1.1 201 CreatedLocation: http://localhost/geoserver/rest/workspaces/momo-rest/datastores/db_momo_ws_rest/featuretypes/countries_rest - Additionally we can also have a look at the preview page to ensure the layer is correctly published.
Create and upload style
We can use the REST API both to create a new style object in GeoServer and to insert an existing SLD-file into it. At first we need to create a new SLD file on our local machine we'll need in the next step. For this purpose we can use the style already used in the previous module.
- Open the terminal and navigate to your home directory with:
$ cd ~ - Create and open a new SLD file
countries-style.sldin this directory with:$ nano countries-style.sld - Copy the linked SLD content (see here)
the newly created file and save it with
Ctrl + O. You can now close the nano editor withCtrl + X.
We will now create the style and upload the SLD file we just created.
- Copy the following block into your terminal and execute it to create a new
style object:
$ curl \ -v \ -u admin:momo-ws \ -XPOST \ -H "Content-type: text/xml" \ -d "<style> <name>countries_rest</name> <filename>countries-style.sld</filename> </style>" \ http://localhost/geoserver/rest/workspaces/momo-rest/styles - And again, verify that the response contains the lines
andHTTP/1.1 201 CreatedLocation: http://localhost:80/geoserver/rest/workspaces/momo-rest/styles/countries_rest - Afterwards we can upload the style created above with (Note: Ensure the path
to file
countries-style.sldis correct!):$ curl \ -v \ -u admin:momo-ws \ -XPUT \ -H "Content-type: application/vnd.ogc.sld+xml" \ -d @countries-style.sld \ http://localhost/geoserverrest/workspaces/momo-rest/styles/countries_rest - This command should complete with:
HTTP/1.1 200 OK
Assign a layer style
After we have created the style, we can assign this style to the layer
countries_rest.
- Copy and execute the following command in the terminal window:
$ curl \ -v \ -u admin:momo-ws \ -XPUT \ -H "Content-type: text/xml" \ -d "<layer> <defaultStyle> <name>countries_rest</name> <workspace>momo-rest</workspace> </defaultStyle> </layer>" \ http://localhost/geoserver/rest/layers/momo-rest:countries_rest - After finished with
HTTP/1.1 200 OKwe can open the preview page to review the changes made to the layer style.