Creating a Map
In OpenLayers, a map is a collection of layers and various interactions and controls for dealing with user interaction. A map is generated with three basic ingredients: markup, style declarations, and initialization code.
Working Example
Let's take a look at a fully working example of an OpenLayers 3 map.
<!doctype html>
<html lang="en">
  <head>
    <link rel="stylesheet" href="/ol.css" type="text/css">
    <style>
      #map {
        height: 256px;
        width: 512px;
      }
    </style>
    <title>OpenLayers 3 example</title>
    <script src="/loader.js" type="text/javascript"></script>
  </head>
  <body>
    <h1>My Map</h1>
    <div id="map"></div>
    <script type="text/javascript">
      var map = new ol.Map({
        target: 'map',
        layers: [
          new ol.layer.Tile({
            title: 'Global Imagery',
            source: new ol.source.TileWMS({
              url: 'http://demo.opengeo.org/geoserver/wms',
              params: {LAYERS: 'nasa:bluemarble', VERSION: '1.1.1'}
            })
          })
        ],
        view: new ol.View({
          projection: 'EPSG:4326',
          center: [0, 0],
          zoom: 0,
          maxResolution: 0.703125
        })
      });
    </script>
  </body>
</html>
Tasks
- Make sure you've completed the setup instructions to install dependencies and get the debug server running.
- Copy the text above into a new file called
map.html, and save it in the root of the workshop directory. - Open the working map in your web browser: http://terrestris.github.io/momo3-ws//map.html
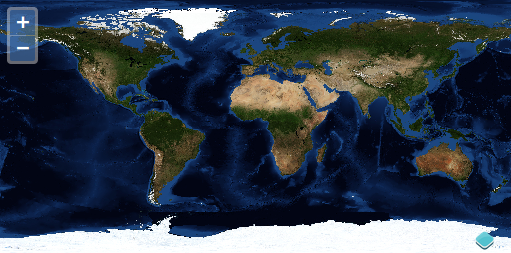
Having successfully created our first map, we'll continue by looking more closely at the parts.