Prerequisites
Before we can start importing and reading data in this modules, we have to create
a new database on the (already installed) PostgreSQL database server as data
source for new layers. Thus we will use the administration tool pgAdmin III.
Let's start by opening it:
- Click
Menuin the lower left corner and search forpgadmin - In the resulting list select
pgAdmin III( ) to
open the tool.
) to
open the tool.
Add a new server connection in pgAdmin
Once pgAdmin has started we can create a new connection to our PostgreSQL database server:
- Create a new server connection by selecting
File❭Add Serverin the top menu bar and enter the following:- Name: momo-workshop
- Host: localhost
- Port: 5432
- Username: momo
- Password: momo
- Store password: checked
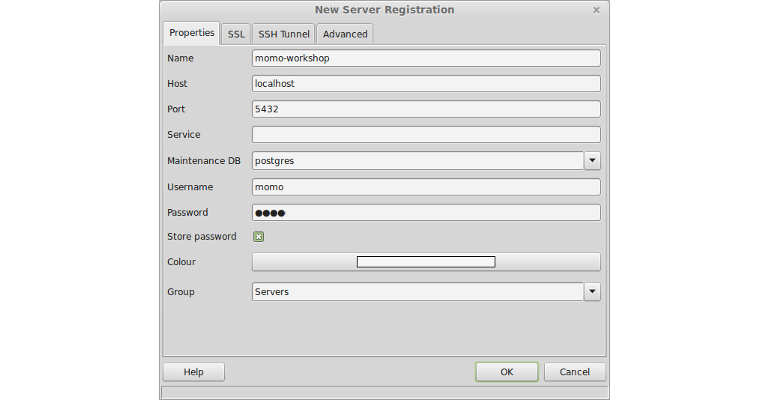
- Click
OK
Creating a database
Now we can connect to this server by a double click on the newly created entry
in the left hand sided Object browser (or open the context menu for this entry
and select Connect as shown below).

Within the next steps we will create a new database on this database server:
- Open the SQL-Query window by clicking the icon
 in the upper toolbar. Note:
If the icon is greyed out, select the existing database
in the upper toolbar. Note:
If the icon is greyed out, select the existing database postgresfirst. - Copy the following SQL block into the SQL-Query window:
CREATE DATABASE db_momo_ws WITH OWNER = momo ENCODING = 'UTF8' TABLESPACE = pg_default CONNECTION LIMIT = -1; - Click
Execute query( ) in the upper
toolbar to run the query.
) in the upper
toolbar to run the query. - After successful execution go back to the
Object browser, select the server and refresh the actual view (by pressingRefresh the selected object( ) in the top toolbar) and ensure
you have a new database entry named
) in the top toolbar) and ensure
you have a new database entry named db_momo_wspresent. - Close the SQL-Query window.
Creating a schema
Once the database is created, we'll create a new schema in this database. This schema will be used to store any geodata table we are going to import in this workshop.
- Select the newly created database
db_momo_wsin theObject browserand open the SQL window (). If you
haven't closed the SQL-Query window before, please verify that you are
connected to the correct database in the upper toolbar. Otherwise all
subsequent SQL queries will be executed on the wrong database! - Copy the following SQL block into the SQL-Query window to create a new schema
named
geodata:CREATE SCHEMA geodata AUTHORIZATION momo; - Click
Execute query() to run the query. - Refresh the
Object browserand ensure the new schema is being created in the databasedb_momo_ws.
Enable spatial functionality
In the final step we will add support for geographic objects by enabling the
spatial database extension PostGIS for our database db_momo_ws.
- Open the SQL window (if not already opened) and paste in the following SQL
block to spatially enable the database
db_momo_ws:CREATE EXTENSION postgis; - Click
Execute queryto run the query. - Ensure the extension is being successfully installed by executing the
following query:
SELECT PostGIS_full_version();"POSTGIS="2.1.2 r12389" GEOS="3.4.2-CAPI-1.8.2 r3921" PROJ="Rel. 4.8.0, 6 March 2012" GDAL="GDAL 1.10.1, released 2013/08/26" LIBXML="2.9.1" LIBJSON="UNKNOWN" RASTER"